Quick Tips
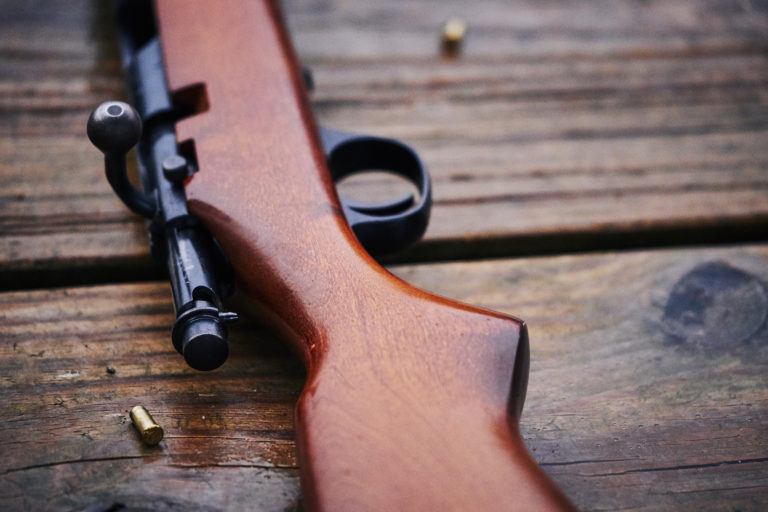
Few things are as satisfying as a meticulously maintained 22 rifle. Whether it’s your prized target practice weapon or a trusted companion for plinking at the range, a clean rifle is a safe rifle. Neglecting regular cleaning can lead to residue buildup, misfires, or even worse—a degraded accuracy that turns your hobby into a hazardous guessing game. In this guide, we’ll walk you through 5 essential steps to clean your 22 rifle. With a mix of practical advice, a touch of dark humor, and a few unconventional tips, you’ll learn how to restore your firearm to its optimal condition—all while ensuring safety remains your top priority.
Why Clean Your 22 Rifle?
Every shot fired leaves behind a cocktail of powder residue, lubricants, and carbon buildup. Over time, these deposits not only mar the sleek finish of your firearm but also interfere with the mechanical reliability and accuracy of your rifle. As recommended by the National Rifle Association (NRA), proper maintenance—including regular cleaning—is crucial for preventing misfires and ensuring your rifle performs reliably when it matters most. Moreover, a clean rifle minimizes the risk of corrosion, which can slowly eat away at metal surfaces much like a slow-acting poison. Think of it this way: just as you wouldn’t drive a car without an oil change, you shouldn’t expect your 22 rifle to perform without a thorough cleaning routine.
General Supplies You’ll Need
- Unloading Tools and Safety Gear: Always start by ensuring your rifle is completely unloaded. Double-check that there’s no ammunition in the chamber.
- Gun Cleaning Solvent: A specialized solvent designed to break down powder residue and carbon buildup without damaging the metal.
- Cleaning Patches and Bore Brushes: Use these with your cleaning rod to scrub the inner barrel and remove stubborn deposits.
- Microfiber Cloths: Soft, non-abrasive cloths for wiping down external surfaces.
- Lubricating Oil: A light, high-quality lubricant to ensure moving parts operate smoothly.
- Toothbrush or Soft Brush: For detailed cleaning around small parts and tight corners.
- Compressed Air (Optional): Helps blow out lingering dust or solvent in hard-to-reach areas.
For those interested in broader metal maintenance tips, check out our How to Clean Aluminum guide.
Step-by-Step: How to Clean Your 22 Rifle
1. Safety First—Unloading and Disassembly
Before you even think about a cleaning cloth, safety is paramount. Begin by ensuring that your 22 rifle is completely unloaded. Remove the magazine (if applicable) and visually inspect the chamber to confirm no round is present. This step isn’t just a suggestion—it’s a non-negotiable rule that separates careful enthusiasts from potential hazards. Once you’re confident your rifle is safe, disassemble it as much as the manufacturer’s instructions allow. Typically, this means separating the barrel, bolt, and stock. Refer to your owner’s manual for exact details, as improper disassembly could lead to damage or void warranties. Remember, a well-prepared disassembly makes the subsequent cleaning steps much more effective and thorough.
2. Clean the Barrel: Patches, Brushes, and Solvent
Now that your rifle is safely disassembled, focus on the heart of the matter—the barrel. Attach a bore brush to your cleaning rod and dip it into the gun cleaning solvent. Run the brush through the barrel several times, scrubbing out powder residue, carbon buildup, and any potential corrosion. After brushing, switch to cleaning patches. Push a solvent-soaked patch through the barrel, then follow it with dry patches until they come out clean. If you encounter stubborn residue, reapply the solvent and repeat the process. This meticulous routine not only ensures the barrel is free of obstructions that could alter bullet trajectory but also extends the life of your firearm.
3. Tackle the Bolt and Other Moving Parts
With the barrel clean, turn your attention to the bolt and other components. Using a soft brush or an old toothbrush, gently scrub the bolt face, extractor, and ejector areas. These parts often accumulate a fine layer of residue that can interfere with smooth cycling. Wipe them down with a microfiber cloth dampened in gun cleaning solvent, being careful not to oversaturate any plastic components. After cleaning, apply a small amount of lubricating oil to the moving parts as recommended by your rifle’s manufacturer. This lubrication is crucial for ensuring reliable operation, especially when your rifle is exposed to the elements. Always wipe away any excess oil to avoid attracting additional dust and debris.
4. Clean the Exterior
Your rifle’s external surfaces also deserve attention. Wipe down the stock, receiver, and any other metal parts with a microfiber cloth and a small amount of solvent. This helps remove fingerprints, dirt, and other contaminants that can dull the finish over time. If your rifle features a synthetic or wooden stock, be cautious not to over-wet it. For wood, use a slightly damp cloth and then dry it immediately. For synthetic stocks, a gentle cleaning with solvent is typically safe. Maintaining the exterior not only keeps your firearm looking sharp but also helps prevent the corrosion that can occur from accumulated grime.
5. Reassemble and Final Inspection
Once every component is thoroughly cleaned and properly dried, it’s time to reassemble your rifle. Follow your owner’s manual carefully to ensure every part is returned to its rightful place. After reassembly, perform a function check to confirm that the bolt cycles smoothly, the safety engages properly, and the rifle is ready for action. A final light wipe with a clean microfiber cloth can remove any residual cleaning solvent and polish the exterior to a nice shine. This final step is more than just aesthetic—it’s the assurance that your rifle is in optimal working condition and ready to perform reliably at the range.
Additional Tips and Preventive Measures
- Regular Maintenance: Don’t wait for a full-on cleaning session. Regular light cleanings after each shooting session can prevent heavy buildup and ensure your rifle remains reliable.
- Use Quality Products: Invest in reputable gun cleaning solvents and lubricants. Cheap alternatives might save a buck but can cause damage in the long run.
- Environmental Considerations: Clean your rifle in a well-ventilated area, and dispose of used cleaning patches and solvents responsibly. Proper disposal is as important as the cleaning process itself.
- Routine Inspections: Even if you’re not using your rifle regularly, periodic inspections can catch issues like corrosion or lubrication breakdown before they become serious problems.
- Consult Manufacturer’s Guidelines: Always refer to your specific firearm’s manual for disassembly and cleaning recommendations. What works for one model might not be ideal for another.
For additional insights on routine maintenance and safety checks, you might find the NRA’s guidelines on firearm safety and care useful.
Maintaining Your Rifle for Longevity
A clean rifle isn’t just about immediate performance—it’s an investment in the longevity of your firearm. Routine cleaning removes corrosive elements and ensures that all moving parts function smoothly, reducing wear and tear over time. Just as you would keep your hardwood floors polished and protected, your rifle deserves regular attention to maintain its reliability and aesthetic appeal. With proper care, your 22 rifle will not only deliver consistent performance but also serve as a testament to your commitment to safe, responsible gun ownership.
Enjoying the Fruits of a Clean Rifle
There’s a unique satisfaction in knowing your rifle is in prime condition—a tool that’s ready to perform without fail, whether you’re at the shooting range or simply admiring it at home. Regular cleaning might seem like a chore, but it’s a critical part of responsible firearm ownership. With these 5 essential steps, you now have a reliable roadmap to keeping your 22 rifle spotless, safe, and in perfect working order. So go ahead, treat your firearm to a little TLC; your next shot might just be your best one yet.