Quick Tips
You don’t notice it at first. One day, your headlights are blazing like twin suns, and then, slowly, they begin to dim. Maybe you tell yourself it’s just your imagination. Maybe you blame the streetlights, the weather, the time of year. But then it happens—one night, you flick them on, expecting to carve through the darkness, and all you get is a sickly, yellowed glow. It’s not the bulbs. It’s the grime. The oxidation. The slow, creeping decay that’s turned your headlights into cloudy, useless orbs. And now, you’re driving blind.
The good news? You can fix it. The bad news? You have to fix it. Because if you don’t, you’re rolling the dice every time you hit the road at night. Let’s get to work.
Why Your Headlights Are Foggy (And Why It Matters)
Your car’s headlights are made of polycarbonate plastic, which, while durable, has one fatal flaw: it hates the sun. Ultraviolet radiation eats away at the protective coating, oxidizing the surface until your once-clear lenses look like they belong to a car abandoned in a junkyard. Add road grime, pollution, and microscopic pitting from debris, and suddenly, your high beams are about as useful as a pair of dim flashlights.
Driving with hazy headlights is not just embarrassing—it’s dangerous. Poor visibility means reaction times shrink. Other drivers don’t see you as well. And worst of all, the problem doesn’t go away on its own. Ignoring it only lets the damage get worse.
So we clean. We restore. We take back the night.
What You Need to Fight the Fog
You can’t just wipe your headlights down with a paper towel and call it a day. You need tools. Weapons. A full arsenal for battle against oxidation and grime.
- Soap and Water – The bare minimum to strip off dirt before the real work begins.
- Masking Tape – Protects your car’s paint because you will get aggressive.
- Baking Soda and Vinegar – A chemical reaction that’s nature’s little scrubbing power couple.
- Toothpaste – Mild abrasives make this a surprisingly effective polishing agent.
- Fine-Grit Sandpaper (800, 1000, 2000, 3000 grit) – For when things get really bad.
- Microfiber Cloths – Because paper towels are for quitters.
- Plastic Polish or Rubbing Compound – The finishing touch.
- UV-Resistant Clear Coat – So you don’t have to do this again in six months.
Cleaning Headlights: A Step-by-Step Guide
1. Wash the Headlights and Tape Off the Area
Get rid of surface dirt so you can see what you’re really up against.
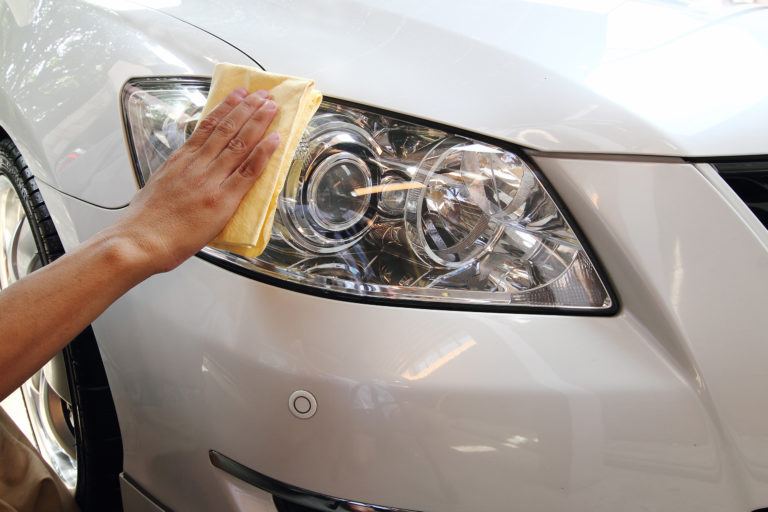
Start with soap and water, scrubbing away dust and grime. Rinse and dry completely. Once the surface is clean, apply masking tape around each headlight. This isn’t just busywork—you’re about to sand and scrub, and one wrong move means a scratched-up paint job.
2. Attack with Toothpaste or Baking Soda & Vinegar
Apply an abrasive cleaner to strip away surface oxidation.
Squirt non-gel toothpaste onto a microfiber cloth and rub it into the headlight in firm, circular motions. The mild abrasives help break down oxidation. If toothpaste feels too weak, mix baking soda with vinegar into a paste and scrub it in. Let it sit for five minutes, then rinse.
3. Assess the Damage and Decide if Sanding is Necessary
If your headlights still look foggy, it’s time to escalate.
If toothpaste and baking soda didn’t cut it, you need to sand. Wet a sheet of 800-grit sandpaper and, keeping the surface constantly wet, sand in straight horizontal strokes. Move up to 1000-grit, then 2000-grit, then 3000-grit, changing directions each time. By the end, your headlights will look matte but smooth.
4. Polish the Surface
Restore clarity with a proper polishing compound.
Apply plastic polish or rubbing compound using a clean microfiber cloth. Buff it in with firm, circular motions, watching as the haze vanishes. This step is critical—skipping it leaves your headlights looking scratched and unfinished.
5. Wipe Everything Down and Inspect
Step back and admire your work—or prepare for another round.
Rinse off any remaining polish or sanding residue. Dry thoroughly with a microfiber cloth. If your headlights still look cloudy, repeat steps 3 and 4 until you achieve crystal-clear results.
6. Apply UV-Resistant Clear Coat
Protect your work so you don’t have to do this again anytime soon.
Even the best restoration job won’t last without protection. Apply a UV-resistant clear coat, following the manufacturer’s instructions. This seals the plastic against future oxidation, keeping your headlights clear for months—or even years.
7. Let Everything Cure Before Driving
Don’t undo your work by rushing.
Give the sealant at least an hour to dry before hitting the road. If you’re serious about longevity, let it cure overnight before exposing it to rain or car washes.
Alternative Methods and Professional Insights
If you’re not into DIY, headlight restoration kits offer a one-stop solution. They typically include sandpaper, polish, and a sealant—everything you need in one package. Professional detailing services can also handle the job, often using industrial-grade polishers and UV protectants for longer-lasting results.
Want a quick fix? Some people swear by bug spray, but don’t do it. The DEET temporarily melts the oxidation, making headlights look clear, but it degrades the plastic, leaving them worse off in the long run. (milwaukeesubarucity.com)
The Final Verdict: See and Be Seen
Headlight restoration isn’t just about looks—it’s about safety. It’s about refusing to drive blind into the night, about reclaiming control over what lies ahead. Your headlights are the eyes of your car. Keep them clear, and the road ahead will always be visible.
Want to tackle more grime? Check out How to Clean Car Seats and How to Clean Glass for more vehicular upkeep.