Quick Tips
You hop into your car, ready to head out, and then you see it—mystery stains, crumbs, and enough pet hair to knit a sweater. Maybe it’s from coffee spills, kids, or that one time you swore you wouldn’t eat fast food in your car (but did anyway). Either way, dirty car seats aren’t just an eyesore—they’re a breeding ground for bacteria and odors. It’s time to restore your seats to their former glory.
Why Cleaning Car Seats Matters
Car seats absorb dirt, sweat, food particles, and even skin oils over time. If left uncleaned, they can develop permanent stains, foul odors, and even mold growth. Regular maintenance not only extends the life of your upholstery but also improves the overall hygiene and comfort of your vehicle. Plus, if you ever plan to sell your car, spotless seats can increase its resale value. Let’s get started.
What You’ll Need for Professional-Level Car Seat Cleaning
Before diving in, gather the following supplies:
- Vacuum cleaner with brush and crevice attachments – Essential for removing surface debris.
- Upholstery cleaner or mild detergent – Choose a formula that’s safe for your seat material.
- Microfiber cloths – Gentle on fabric and leather.
- Soft-bristled brush – Helps scrub stains without damaging upholstery.
- Steam cleaner (optional but effective) – Removes deep-set grime and kills bacteria.
- Baking soda – Great for deodorizing fabric seats.
- Leather conditioner (for leather seats) – Keeps leather soft and prevents cracking.
How to Clean Car Seats Like a Professional in 7 Steps
1. Vacuum Thoroughly to Remove Loose Debris
Start by using a vacuum cleaner with a brush and crevice attachment to remove dirt, dust, and debris. Pay special attention to seams, seat edges, and underneath the seats where crumbs and dust love to hide. If you have pet hair, use a rubber glove or pet hair removal brush to lift stubborn fur from fabric surfaces. This step prevents dirt from turning into mud when you apply cleaning solutions, making the process far more effective. A thorough vacuuming sets the stage for deep cleaning by eliminating loose particles that could otherwise scratch or further embed into the seat material.
2. Identify Your Seat Material and Choose the Right Cleaner
Car seats come in different materials, and using the wrong cleaner can cause damage. Fabric seats require a dedicated upholstery cleaner or a mix of warm water and mild detergent. Leather seats need pH-balanced leather cleaner to avoid drying or cracking. Vinyl seats can be cleaned with a mixture of mild soap and water. Always do a spot test in an inconspicuous area before applying any cleaning solution. Using the correct product ensures a deep clean without compromising the integrity of your upholstery, preventing fading, stiffening, or discoloration.
3. Pre-Treat Stains for Better Removal
For stubborn stains like coffee, ink, or grease, apply a stain remover or a DIY baking soda paste (baking soda and water). Let it sit for 10-15 minutes to break down the stain before scrubbing. For organic stains like food or sweat, use an enzyme-based cleaner, which breaks down proteins and eliminates odors. If dealing with an old stain, repeated applications may be necessary. The key to professional stain removal is patience—allow the cleaner to work before scrubbing aggressively. Rushing this step can push stains deeper into the fabric, making them harder to lift.
4. Scrub and Agitate to Lift Dirt
Using a soft-bristled brush, gently scrub the seat in circular motions to lift dirt and grime. Work section by section, ensuring even coverage. For fabric seats, avoid over-saturating the material, as excess moisture can lead to mildew. If using a steam cleaner, hold the nozzle a few inches away to loosen embedded dirt without soaking the fabric. For leather seats, use a microfiber cloth to apply cleaner, following the grain of the leather. Scrubbing is essential for breaking up ground-in dirt, but excessive force can damage the upholstery. Always let the cleaner do the heavy lifting before applying elbow grease.
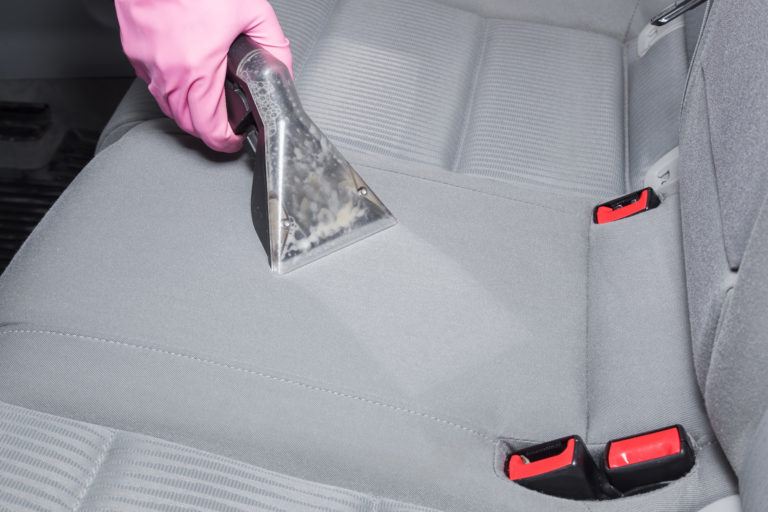
5. Wipe Down and Extract Excess Moisture
After scrubbing, use a clean microfiber cloth to blot away excess moisture and lifted dirt. If you have access to a wet/dry vacuum, use it to extract excess cleaning solution from fabric seats to speed up drying. For leather seats, ensure that no residue is left behind by wiping with a damp microfiber cloth, followed by a dry one. Removing excess moisture prevents water spots and helps upholstery dry faster. Leaving too much cleaner behind can result in residue buildup, attracting more dirt over time and making seats feel stiff or sticky.
6. Deodorize and Freshen Up
To eliminate odors, sprinkle baking soda over fabric seats and let it sit for 15-20 minutes before vacuuming. For a deeper freshening, use an upholstery-safe air freshener or place an open box of activated charcoal under the seats to absorb lingering smells. For leather seats, applying a light mist of leather conditioner with a subtle scent helps maintain freshness while preventing cracking. Odor removal is just as important as stain removal—no one wants to sit in a car that smells like a gym locker. Taking this extra step ensures a completely refreshed interior.
7. Protect and Maintain for Long-Term Cleanliness
For fabric seats, apply a fabric protector spray to repel future stains and spills. For leather seats, apply a leather conditioner to keep them soft, supple, and resistant to cracks. Avoid using petroleum-based products, as they can degrade leather over time. Regular maintenance includes weekly vacuuming, wiping down seats with a damp microfiber cloth, and addressing spills immediately to prevent long-term damage. Protecting your seats after cleaning ensures they stay fresher for longer, making future cleanings much easier and preventing costly reconditioning down the line.
How Professional Detailers Clean Car Seats
Professional car detailers use advanced techniques and equipment to achieve deep cleaning results, including:
- Steam cleaning – Uses heat and pressure to lift stains without excessive moisture.
- Foam extraction machines – Deep cleans fabric while removing all residue.
- Ozone treatment – Neutralizes tough odors like smoke and mildew.
- Leather rejuvenation kits – Restores and protects aging leather seats.
If your seats are heavily soiled or have deep-set stains, consider professional detailing (Professional upholstery cleaning benefits).
How Often Should You Clean Your Car Seats?
- Light cleaning: Weekly vacuuming and wiping down seats.
- Deep cleaning: Every 2-3 months, or more often if kids or pets are frequent passengers.
- Leather conditioning: Every 3-6 months to prevent drying and cracking.
Final Thoughts
Cleaning your car seats regularly keeps your vehicle looking great and eliminates bacteria and odors that build up over time. Whether you choose a DIY deep clean or professional detailing, keeping your seats fresh ensures a more enjoyable and hygienic ride.
For more car care tips, check out How to Clean a Car Like a Professional. Keep your seats spotless and ride in comfort!