Quick Tips
Grout is the silent victim of your bathroom and kitchen crimes. Every spill, every missed mop session, every shower that fogged up the mirror but never quite got the job done—it all ends up here. The thin lines between your tiles, once bright and pristine, now resemble the streets of a dystopian wasteland. Neglect has turned them into stained, grimy crevices, collecting mildew, dirt, and who-knows-what-else. But here’s the thing: grout is meant to be clean. That’s why you’re here—to undo years of accumulated regret and bring it back to life.
The Truth About Dirty Grout
Grout is porous, which means it soaks up every drop of filth it encounters like a sponge with no self-respect. It’s why those once-white lines now look gray, brown, or suspiciously green in places where moisture lingers. If you ignore it long enough, it doesn’t just look bad—it starts harboring bacteria, mold, and allergens (The Risks of Dirty Bathroom Surfaces). Left unchecked, mildew creeps in, stains set permanently, and the very air around your tile starts to feel damp and musty. If that’s not enough motivation, think of it this way: clean grout doesn’t just make your floors look new again, it protects the tiles themselves from water damage and deterioration (How Proper Tile Maintenance Extends Longevity).
Cleaning Grout: A Step-by-Step Guide
Step 1: Gather Your Cleaning Arsenal
You’re not scrubbing this stuff away with just water and a desperate prayer. Before you start, grab some oxygen bleach, a stiff-bristled brush, a bucket of warm water, and some old towels—because grout cleaning is a messy, damp endeavor. Unlike chlorine bleach, which can discolor your grout and corrode the surface over time, oxygen bleach is a safer, non-toxic alternative that lifts stains without destroying the material. If you don’t have it, a mixture of baking soda and hydrogen peroxide will do the trick. And unless you enjoy the feeling of gritty, gray water dripping down your arms, gloves are highly recommended.
Step 2: Prepare and Apply the Grout Solution
Mix your cleaning potion by combining two tablespoons of oxygen bleach with two cups of warm water. Stir until dissolved, then pour it directly onto the grout lines, making sure each section is fully saturated. Unlike those weak, store-bought sprays that promise miracles but barely lift the top layer of dirt, this solution seeps deep into the grout, breaking down years of built-up grime. Let it sit for at least 15 minutes—this is the moment where science does its thing, so resist the urge to start scrubbing immediately. If you’re working on vertical tiles, pour the solution into a spray bottle and coat the grout evenly, ensuring the liquid clings instead of running down the wall in a soapy cascade.
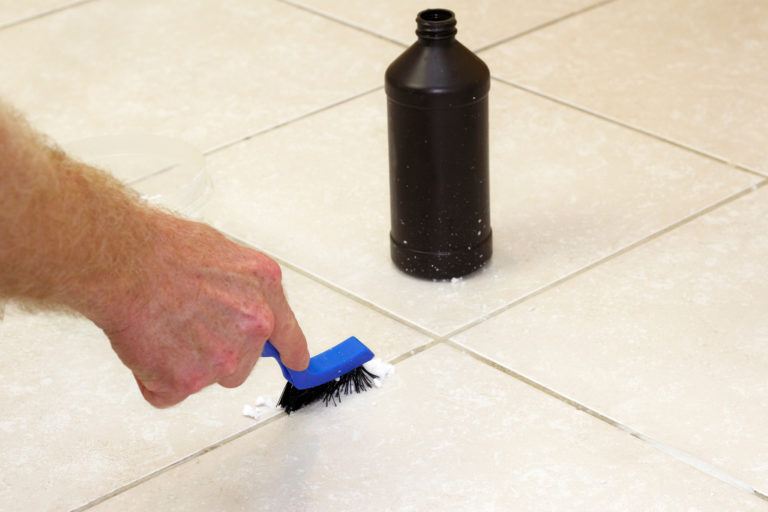
Step 3: Scrub Like You Mean It
Once the bleach solution has had time to break down the filth, it’s time for the real work. Grab your stiff-bristled brush and start scrubbing each grout line with focused intensity. Small, circular motions work best—back-and-forth scrubbing tends to just push the dirt around instead of lifting it out. If your grout is particularly disgusting, reapply the solution and go in for round two. The goal is to restore the grout’s original color, and that won’t happen with half-hearted effort. If you find yourself wondering why you let it get this bad in the first place, don’t worry—you’re not alone.
Step 4: Rinse and Wipe Down the Area
Now that your grout is free from the sins of your past neglect, it’s time to rinse away the evidence. Grab a clean sponge or microfiber cloth and soak it in warm water, then wipe away all remaining residue. Don’t skip this step—if you leave the solution sitting, it will dry into a powdery film, making your tiles look hazy and dull. For floor tiles, use a damp mop to go over the entire area, ensuring no bleach or loosened dirt gets left behind. If your grout was exceptionally grimy, change the rinse water frequently to avoid just smearing old grime around.
Step 5: Dry Everything and Inspect Your Work
Grout is like a sponge, and the last thing you want is to leave it damp, inviting mildew to take root all over again. Use old towels or dry microfiber cloths to absorb any lingering moisture. Once dry, step back and admire your work. If any areas still look stained, you may need to spot-treat them with a baking soda paste—just mix baking soda with a little water, apply it to the stubborn spots, let it sit for 10 minutes, then scrub and rinse again. If your grout is beyond saving, it might be time to regrout—a task best left to professionals unless you enjoy tedious, soul-crushing DIY projects.
Step 6: Seal the Grout to Keep It Clean Longer
If you don’t want to repeat this process every few months, you need to seal your grout. A good grout sealer creates a protective barrier, making it harder for stains and moisture to seep in. Using a small brush or roller, apply the sealer along each grout line, making sure not to get it on the tiles themselves. Let it cure for 24 hours before exposing it to water—yes, that means no showers if you’re sealing bathroom grout, so plan accordingly. A properly sealed grout line can stay clean for years with just regular mopping instead of deep scrubbing.
Alternative Grout Cleaning Methods
If oxygen bleach isn’t your thing, there are other ways to clean grout:
- Baking soda and hydrogen peroxide is a great natural alternative, forming a paste that lifts stains without harsh chemicals.
- Vinegar and water works well for maintenance, but don’t use it on natural stone tiles—it can eat away at the finish (Why Vinegar is Bad for Natural Stone).
- Steam cleaning is the most chemical-free method and works wonders on deeply embedded grime, though it requires a good quality steam cleaner to be effective.
How the Professionals Do It
If your grout has gone from dirty to permanently discolored, you might need a professional cleaning service. Experts use industrial-strength steam cleaners and high-powered suction equipment to blast away stains without damaging the tile. Some even apply color-sealing treatments, essentially dying the grout back to its original shade—ideal for cases where no amount of scrubbing seems to work.
Final Thoughts
Cleaning grout is one of those things you never think about until you suddenly can’t ignore it anymore. Let it go too long, and you’ll be scrubbing for hours just to get back to square one. But with regular maintenance and the occasional deep clean, you can keep your grout looking as fresh as the day it was installed.
If you’re also battling filthy floors, check out How to Clean Tile Floors or How to Clean a Bathroom Properly for more ways to keep your space spotless.