Quick Tips
- Sweep or Vacuum the Floor
- Optional Pre-Treatment ? Baking Soda Sprinkle
- Mix Your Cleaning Solution
- Mop the Floor (Gently Does It)
- Rinse the Floor
- Dry the Floor Thoroughly
- Buff Up Stubborn Stains (If Needed)
Cleaning linoleum floors might not sound like the most glamorous household task, but it sure beats watching your beautiful floor morph into a sticky abstract art piece. Linoleum is a durable, eco-friendly flooring that can easily last 30 to 40 years when properly cared for. In this humorous yet handy guide, we’ll walk you through a step-by-step tutorial on turning your linoleum from drab to fab. Whether you prefer grandma’s tried-and-true vinegar solution or a snazzy commercial cleaner, we’ve got options for you. So put on your cleaning cape (and maybe some old dance shoes), and let’s get that linoleum shining – all while having a laugh or two along the way!
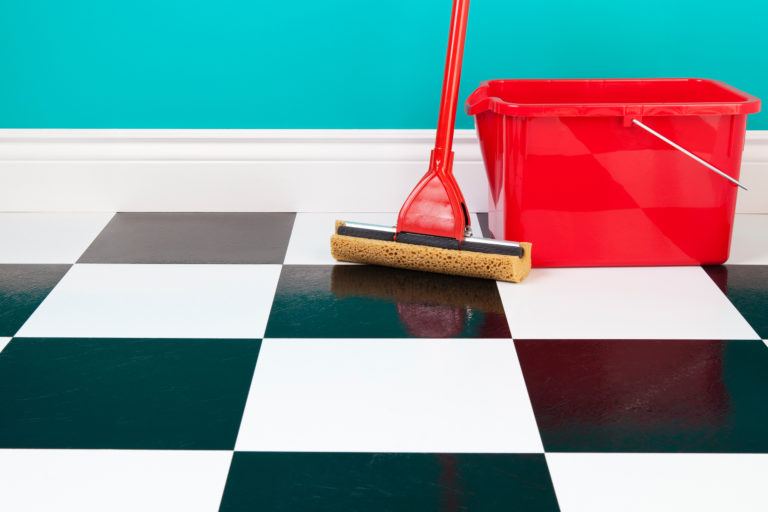
Tools & Supplies Needed
Having the right supplies (like a mop, bucket, mild cleaner, and soft brushes) is key to a linoleum floor cleaning spree. Before you channel your inner domestic superhero, gather your cleaning arsenal. Here’s what you’ll need for the mission:
- Broom or Vacuum: To evict the dust bunnies and crumbs lurking around. (Your vacuum’s “hard floor” setting is your linoleum’s best friend.)
- Dust Mop or Microfiber Cloth: Great for grabbing fine dust. Think of it as the gentle yoga instructor for your floor, stretching out dirt without scratching.
- Bucket: Preferably a sturdy one that won’t tip over when you do your victory dance. One bucket for the cleaning solution and another for rinsing with clean water works best.
- Mop (Two Types): A classic wet mop for washing and a dry microfiber mop for daily dust patrol. (If you only have one mop, don’t worry – you can rinse between steps. Just remember: linoleum likes a damp mop, not a soaking wet swamp mop.)
- Mild Cleaner: You have choices here. A few drops of dish soap in warm water works wonders. Or use a pH-neutral floor cleaner labeled safe for linoleum/vinyl floors. We’ll discuss homemade and commercial options later, from vinegar concoctions to ready-made cleaners.
- White Vinegar (Optional): The not-so-secret weapon for eco-friendly cleaning – more on this in the DIY section.
- Baking Soda (Optional): For tackling stubborn scuffs or grime with gentle abrasion (also doubles as a fine floor seasoning – just kidding, please don’t eat off the floor!).
- Soft Bristle Scrub Brush or Old Toothbrush: To coax out stubborn dirt in textured areas or corners, without scratching the linoleum’s surface. Save the steel wool for pots and pans – your floor is sensitive.
- Cloths or Old Towels: For drying the floor and buffing away any residual moisture. Your linoleum will appreciate the soft touch (and nobody likes accidental skating rink situations from leftover wet spots).
- Protective Gear (Optional): If you’re using any cleaner that’s strong or you value your manicure, rubber gloves can help. An apron or old clothes are wise unless you’re going for the speckled look.
With these tools and supplies at the ready, you’re all set to sweep grime to the curb – literally. Now, let’s break down the cleaning process step by step, with a smile on our face and a mop in our hand.
Cleaning Linoleum: A Step-by-Step Process
Ready to transform your linoleum from dull to dazzling? Follow these simple steps. We promise to keep things easy to follow and throw in a chuckle or two for good measure.
- Sweep or Vacuum the Floor: Start by evicting all the loose dirt, dust, and pet hair tumbleweeds from your floor. Even if it looks clean, don’t skip this – grit can scratch linoleum if left around. Use a broom or vacuum (with a hard-floor setting, no beater bar) to get into corners and under appliances. Pro tip: This is a great time to practice your broom guitar skills – the dust bunnies love a good serenade.
- Optional Pre-Treatment – Baking Soda Sprinkle: If your linoleum has ground-in dirt or is giving off “I’ve seen some things” vibes, sprinkle a thin layer of baking soda across the floor before mopping. Baking soda acts as a gentle abrasive to help loosen stubborn grime. It’s like giving your floor a light exfoliation treatment – because even linoleum deserves a spa day. (If your floor isn’t too dirty, you can skip straight to Step 3.)
- Mix Your Cleaning Solution: Time to brew your cleaning potion. Fill a bucket with warm (not scalding hot) water – about a gallon. Add a few drops of mild dish soap and stir to combine. Suds are fun, but you don’t need a bubble bath here; a little soap goes a long way. If you prefer, you could use white vinegar instead of dish soap (more on that in the DIY section) or a capful of a commercial linoleum cleaner. The key is no harsh chemicals. Linoleum hates ammonia or high-alkaline cleaners, so stick to gentle solutions that won’t strip its natural finish. Remember: No boiling cauldrons of bleachy doom – we’re cleaning a floor, not summoning a genie.
- Mop the Floor (Gently Does It): Dip your mop into the bucket and wring it out thoroughly – the mop should be just damp, not dripping. Linoleum doesn’t like being waterlogged, so avoid turning your kitchen into a wading pool. Work in small sections (about 4–6 feet at a time) and mop using smooth strokes. Imagine you’re painting a masterpiece – a clean, shiny masterpiece. Rinse the mop frequently in the solution, wring it out, and continue to the next section. For stubborn spots, apply a little extra elbow grease: you can lightly scrub with your soft brush or a microfiber cloth on scuffs or spills that sneer at your mop’s first pass. If you sprinkled baking soda earlier, you’ll notice a satisfying slight fizz when the damp mop hits it (science in action!). The vinegar or dish soap in your solution will react with the baking soda’s grittiness to help lift grime. Feel free to hum a cheerful tune or have a mini dance-off with the mop – nobody’s watching (except maybe the dog, who is totally judging you).
- Rinse the Floor: After mopping with the soapy solution, it’s time to say goodbye to any soap suds lingering on your linoleum. Dump out the dirty water and refill your bucket with clean, warm water (no soap this time). Go over the floor again with the clean, damp mop, working in sections. This rinse step removes any detergent or vinegar residue that might be left behind. It might seem like an extra hassle, but skipping the rinse can leave a filmy soap residue that actually attracts dirt – as if the floor wasn’t dirty enough the first time! Think of rinsing as the grand finale of the mopping performance, washing away the evidence of past messes.
- Dry the Floor Thoroughly: Linoleum is a bit like a Mogwai from Gremlins – it doesn’t handle being wet for long. No puddles or standing water, please, or the floor might warp or get discolored over time. Use old towels or soft cloths to dry the floor, or pop a clean microfiber mop head on and go over it once more to absorb moisture. You can even channel your inner kid and do the “foot towel shuffle” – lay a towel on the floor and shuffle around on it to speed up drying. (Bonus: it doubles as a low-impact workout!) Your goal is a floor that’s clean and dry to the touch, with no swampy spots. Not only does this protect the linoleum, but it also prevents unintended slip ‘n’ slide incidents in your kitchen.
- Buff Up Stubborn Stains (If Needed): Inspect your gleaming linoleum under the light. See any stains or scuff marks still staring back at you? Don’t panic. For black scuff marks, a paste of baking soda and water can work wonders – gently rub the scuff with the paste using a soft cloth, then rinse and dry. For extra-tough scuffs, you can carefully use a tiny bit of baby oil or WD-40 on a cloth to lift the mark, then clean that oily spot with mild soap and water. (Just be sure to wipe up any slipperiness – we want humor in this article, not people slipping on banana-peel-level pratfalls!) If there’s a mysterious stain that’s seeped into the linoleum over the years, you might try buffing it out with a nylon brush as linoleum’s color goes through the material. In most cases, though, regular cleaning will prevent these woes. Treat any remaining trouble spots gently – this is a floor, not a burnt casserole dish, so no aggressive scrubbing with abrasive pads.
Voila! At this point, your linoleum floor should be looking as fresh as the day it was installed (or at least a lot better than it did an hour ago). Give yourself a pat on the back – or better yet, take a break, grab a snack, and admire how you can now see your reflection in that shine (hello, good-lookin’!). Next, we’ll explore some eco-friendly DIY cleaning options and compare them to commercial products, so you can choose the method that best fits your style (and your sense of smell).
Eco-Friendly & DIY Options for Cleaning Linoleum
Sometimes the best cleaning solutions come straight from your pantry. If you’re the type of homeowner who prefers gentle, non-toxic cleaners – or you just love a good DIY project – this section is for you. Linoleum is made from natural materials and loves mild, natural cleaners. Here are a few eco-friendly and do-it-yourself options that will leave your floor clean and your conscience clear:
- Vinegar and Water Solution: Ah, vinegar – the superhero of natural cleaning. A simple mixture of white vinegar and warm water is cheap, green, and effective. Mix about 1 cup of distilled white vinegar per gallon of warm water for a great all-purpose linoleum cleaner. (If you’re not into measuring, think 1 part vinegar to ~16 parts water.) Vinegar’s mild acidity cuts through grime and disinfects without harsh chemicals. Optional: Add 10-15 drops of an essential oil like lemon or lavender for a pleasant scent that says “I clean, but make it spa-like”. To use: damp mop with your vinegar solution as described in the steps above. No need to fear, the vinegar smell dissipates as it dries – your kitchen won’t smell like a pickle jar forever. Pro tip: For extra cleaning power on a really dirty floor, you can add a squirt of dish soap to the vinegar solution (just don’t forget to rinse afterward, since soap leaves residue). Vinegar is safe for linoleum’s finish and won’t leave a waxy film – just a nice clean floor.
- Baking Soda Paste for Stains: We all encounter those “Ugh, what is that?” spots on the floor – dried-on food, scuffs, or mystery marks courtesy of the kids or pets. Enter baking soda, stage left. If a regular vinegar or soap mopping didn’t erase a stain, make a baking soda paste (mix baking soda with a bit of water until it’s a thick frosting consistency). Gently rub the paste on the stain or scuff using a soft cloth or sponge. Baking soda is mildly abrasive, so it can lift stains without scratching linoleum. After a little elbow grease, rinse the area with clean water and wipe it dry to ensure no white powder is left behind. This trick is especially good for scuff marks and spills that left their mark. It’s like a scrub and polish in one – and yes, it’s totally okay if you break into a little “Wax on, wax off” motion while you do it.
- Lemon Juice Booster: If you love the smell of fresh lemons (and want to channel a lemonade vibe while cleaning), you can add a splash of lemon juice to your vinegar-water solution. The citric acid in lemon helps boost cleaning power a bit and leaves a nice scent. It’s not required, but it’s a natural way to make your kitchen smell like you’ve been cleaning and baking lemon pie (win-win, right?). Just a quarter cup of lemon juice in your gallon of vinegar solution will do. Make sure to strain out pulp if you squeezed a fresh lemon – we’re cleaning floors, not making floor salad.
- Castile Soap Solution: If vinegar isn’t your cup of tea (or cup of smell), a gentle castile soap or mild eco-friendly detergent can be used instead of dish soap. Mix a few drops of castile soap in a gallon of warm water and use it to mop. Castile soap (made from plant oils) is biodegradable and baby-safe, but like any soap, you’ll want to mop again with plain water to rinse any residue. This gives you a green cleaner with a mild soapy scent that won’t strip or damage linoleum finish.
- Club Soda for Shiny Touch-Ups: Here’s a quirky tip: some folks swear by plain club soda as a light-duty floor cleaner. The carbonation can help lift minor grime. You can pour a bit of club soda on a dull spot, wipe with a microfiber cloth, and buff dry. It’s not a deep cleaner, but it can put a little sparkle on the floor and is perfectly safe (it’s basically water). Plus, if you have any left over, you’ve got the base for a fizzy drink when you’re done – cheers to a clean floor!
The beauty of these DIY options is that they’re non-toxic and pet/kid-friendly. You won’t need to ventilate the house or wear a hazmat suit to mop the kitchen. For day-to-day cleaning, a damp mop with a vinegar solution or just water with a drop of dish soap is usually enough to keep linoleum looking nice and fresh. And prevention is half the battle: a doormat at the door and asking family to wipe their feet (or paws) keeps a lot of dirt from ever reaching your linoleum in the first place.
Next, let’s explore the off-the-shelf heavy hitters: commercial products that can save time and effort on linoleum cleaning, and how to use them without fuss.
Commercial Products That Work on Linoleum
Not in the mood to play kitchen chemist? No problem. There are plenty of commercial cleaners that are formulated to clean linoleum effectively – some are even eco-friendly. The key is to choose a cleaner that is pH-neutral, non-abrasive, and safe for linoleum (or vinyl) flooring. Avoid anything overly acidic or alkaline, as those can dull or damage the floor’s surface over time. Here are some top tips and product types to consider:
- Neutral pH Floor Cleaners: Many floor care brands offer a neutral cleaner that’s perfect for linoleum. For example, Armstrong (a major flooring manufacturer) recommends using their “Once ’n Done” no-rinse floor cleaner for regular cleaning of linoleum or vinyl floors. These neutral cleaners won’t leave a sticky residue or strip the floor’s finish, and they usually don’t require rinsing – talk about a time saver! Look for labels like “no-rinse,” “pH-neutral,” or “safe for linoleum/vinyl.” Users often love that these cleaners leave the floor clean and shiny without any dull film. Just dilute according to the package directions (if it’s a concentrate) or spray on (if it’s ready-to-use), mop as directed, and let it dry. Always follow the manufacturer’s instructions – they’ve basically written the cheat sheet for you on the bottle.
- Multi-Surface Floor Cleaners: Products like Bona Hard-Surface Floor Cleaner or other multi-surface cleaners are designed to work on various floor types (tile, laminate, vinyl, etc.), which usually includes linoleum. These are typically sold as sprays or in refillable mop cartridges. They’re convenient because you can spritz and mop without a separate bucket. Bona’s version, for instance, is a water-based formula that is rinse-free and streak-free, and safe for linoleum. Such cleaners are great for quick cleanups. Just spray a section of the floor and wipe it with a microfiber mop. It dries fast and doesn’t leave chemical odors. If you have a favorite hardwood floor cleaner, double-check the label – if it says it’s safe for “sealed hard surfaces” or “laminate/vinyl/linoleum,” you can probably use it on your linoleum too.
- Eco-Friendly Commercial Cleaners: If sticking to green products is important to you, there are brands offering non-toxic, biodegradable floor cleaners. For example, Tru Earth’s Multi-Surface Cleaner is one that’s specially formulated to tackle dirt on linoleum and other floors without leaving residues. These typically come as concentrates or even dissolvable sheets you mix with water. They’re a great option if you want something ready-made that aligns with an eco-friendly ethos. Plus, no harsh chemical smell – your home won’t smell like a science lab after cleaning.
- Disinfecting Floor Cleaners: Every now and then, you might want to disinfect the kitchen floor (post-raw-chicken juice incidents, for instance). Some commercial cleaners double as disinfectants – just ensure they say “safe for linoleum.” Alternatively, diluted household disinfectants (like a splash of bleach in a gallon of water or a pine-oil-based cleaner) can be used occasionally. If you go this route, make sure the area is well-ventilated, use the right dilution (more is not better here), and never mix different chemicals together (more on that in the “What NOT to do” section). After disinfecting, it’s wise to do a plain water mop to remove any chemical residue, as frequent use of strong disinfectants can leave buildup or even discoloration over time. Manufacturers note that if you frequently disinfect, you may need to occasionally strip off buildup with a deep cleaner – or better, stick with gentler methods most of the time and save the heavy hitters for the truly icky messes.
- Linoleum Floor Polish (for Shine): This isn’t a daily or weekly cleaner, but a few times a year you might notice your linoleum looking a bit dull even after cleaning. Linoleum, especially older or high-traffic floors, can benefit from a proper floor polish or sealer to restore its sheen. Products like Armstrong’s Shinekeeper or other linoleum polishes can be applied to a clean, dry floor to put down a thin protective layer. Always clean thoroughly and let the floor dry before polishing (and do not use furniture polish or wax – see the next section for why not!). Polishes are usually applied with a damp mop or special applicator in a thin coat, left to dry, and sometimes a second coat is added for extra gloss. This can rejuvenate an older linoleum and also make routine cleaning easier by sealing up tiny pores in the material. Follow the product instructions to a T, and resist the urge to overdo it – two thin coats are better than one gloopy coat that takes forever to dry. Polishing is optional, but it’s nice to know you have the option to give your floor that “like-new” glow without replacing it.
When using any commercial product, a good rule of thumb is to test a small, inconspicuous area first (maybe a corner behind the fridge) to ensure it doesn’t cause any adverse reaction with your particular floor. This is especially true if your linoleum is old or you’re not sure what finish is on it. Reputable cleaners made for linoleum should be fine, but a quick patch test can save you heartache. Also, moderation is key: more cleaner or a stronger concentration won’t necessarily clean better – it might just leave more residue. So stick to the recommended amounts. Your linoleum will thank you with years of service and a bright smile…er, shine.
Now that we’ve cleaned all the things, let’s go over some important cautions. Even the best of us have made a cleaning faux pas or two. Learn from these common mistakes so you don’t accidentally do your lovely floor wrong.
What NOT to Do With Linoleum Floors
We’ve covered the dos – now it’s time for the definite DON’Ts. Consider this the hall of shame for linoleum cleaning mishaps. Avoid these, and you’ll keep your floor happy (and intact):
- Don’t Drown Your Linoleum: This floor is not a goldfish; it doesn’t need flooding with water. Avoid oversaturating your mop or leaving pools of water sitting on the floor. Excess moisture can seep into seams or the backing and cause warping or water damage over time. In short, no “slip and slide” cleaning techniques. Use a damp (not sopping) mop and always dry the floor afterward. If you ever thought of using a hose indoors for a “quick rinse,” banish the thought – the excessive water will damage your linoleum.
- Never Use Abrasive Scrubbers or Harsh Tools: Steel wool, scouring pads, or abrasive scrub brushes have no business on linoleum. They can scratch or dull the finish faster than you can say “oops.” Stick to soft bristles or microfiber. Likewise, resist any urge to scrape at stains with a putty knife or other sharp object. Linoleum might be durable, but it’s not impervious to gouges. If gentle baking soda paste and a soft cloth won’t budge a stain, it’s better to live with a slight spot than a peeled-up patch of floor. Avoid abrasive scrubbers that could harm the surface – your linoleum will thank you with fewer scuff marks.
- Don’t Mix Cleaning Chemicals: This isn’t a witch’s cauldron or a chemistry class experiment. Ammonia + Bleach = toxic gas, for example – a big no-no. Even mixing vinegar and bleach creates dangerous fumes. Use one cleaner at a time, and rinse out thoroughly before trying another. Honestly, you shouldn’t need heavy-duty chemicals for linoleum anyway. A mild cleaner does the trick. If one product isn’t cutting it, take a breather (literally, get some air), then try a different approach rather than concocting a Frankenstein cleaning solution. Manufacturers explicitly warn never to mix cleaning chemicals unless the label tells you to. You want a sparkling floor, not a homegrown science disaster.
- Avoid Ammonia-Based Cleaners: Ammonia might be great for windows or porcelain, but it’s bad news for linoleum. It’s highly alkaline and can strip the protective finish and even the top layers of the linoleum over time. Using something like straight ammonia or harsh kitchen degreasers on linoleum will leave it dull and vulnerable (kind of like using sandpaper on it, but chemically). Stick to neutral or mildly acidic cleaners. If you read a label and see “ammonium” anything high up on the ingredients, save it for a different surface. Never use ammonia-based cleaners, as they will strip the polish and damage the floor.
- No Bleach or Highly Caustic Cleaners: Linoleum’s color can be affected by strong chemicals. A diluted bleach solution for disinfecting occasionally is okay, but never use full-strength bleach or leave a bleach solution sitting on the floor. It can cause discoloration (and not the kind of tie-dye look you’d want). Similarly, skip oven cleaners, toilet bowl cleaners, or any random harsh chemicals – they’re way too extreme for your modest flooring needs.
- Don’t Use Wax, Furniture Polish, or Oil-based Products (Unless Made for Linoleum): Old-school linoleum did sometimes require waxing, but modern linoleum often has a factory finish. Unless your flooring manufacturer explicitly says to wax it, don’t. Waxes and furniture polishes can build up and actually attract dirt or make the floor slippery. Silicone sprays or oil soaps can leave a greasy film. A big don’t is applying furniture polish or silicone-based products onto linoleum – you’ll end up with a slick floor that could star in its own slip-and-fall comedy. If your floor looks dull, use a polish made for linoleum floors, not car wax or grandma’s secret hardwood tonic. And never apply paste wax or solvent-based polishes meant for wood onto linoleum. It won’t “feed” the linoleum – it’ll just create a mess.
- No Rubber-Backed Rugs: This one surprises many people. Those handy rubber or latex-backed throw rugs can actually stain linoleum over time. The rubber reacts with the floor and leaves yellowish marks that are tough to remove. So use rugs with natural fiber backings or no-slip pads that are approved for use on resilient floors. Never put a latex- or rubber-backed rug on a linoleum floor; it will cause a stain. If you really want to use that cute mat, consider placing a linen or felt pad underneath as a barrier.
- Don’t Overdo the Floor Stripping: Stripping in this context means removing all finish or wax from the floor, usually with a harsh chemical stripper, to reapply fresh polish. It’s a heavy process and shouldn’t be done often. In fact, experts say do not strip linoleum floors more than once a year (and even that is only if needed). High-pH strippers can damage linoleum if used too frequently. Unless your floor has years of old wax buildup that needs removal, you can usually maintain it with gentle cleaning and the occasional polish. If you think your floor needs stripping, consider calling a professional or using a linoleum-safe stripper (neutral pH) – and definitely don’t use generic high-strength floor stripper or you might peel away more than you bargained for.
To sum up: treat your linoleum kindly. No brute force, no extreme chemicals, and no shortcuts that involve potential science-fiction levels of damage. When in doubt, consult the manufacturer’s guidelines (if you have them) or stick to the mild side. Linoleum may have a retro vibe, but that doesn’t mean it enjoys old-school abuse! Avoiding these don’ts will ensure your floor stays in great shape, so you won’t find yourself uttering the words “Well, that was a mistake…” while looking down at a ruined floor.
Linoleum Maintenance Tips
Congratulations – you’ve successfully cleaned your linoleum floor, and maybe even had a bit of fun doing it. Give yourself a high-five (or at least another cookie). Now that the hard part’s done, let’s talk about keeping that floor looking fabulous all the time with minimal effort. After all, routine maintenance is the secret sauce to a long-lasting linoleum glow.
- Regular Sweeping/Dry Mopping: Dirt and grit are like sandpaper to floors. A quick daily sweep or dry mop will prevent scratches and dullness. It doesn’t have to be a big production – a couple of minutes with a microfiber dust mop or a broom each day (or every few days, depending on traffic) keeps the “floor fluffs” at bay. Bonus: your surprise barefoot encounters with crumbs will drop significantly.
- Prompt Spill Cleanup: Life (and gravy) happens. When it does, wiping up spills ASAP will prevent stains and water damage. Linoleum is water-resistant, but not waterproof, especially at the seams. So if Junior drops a full bowl of cereal and milk, channel your inner goalie and swoop in with a cloth immediately. Blot liquids (don’t rub vigorously) to avoid pushing substances into the material. A mild cleaner on a cloth can help get any sticky or colored residue off. Your future self (who won’t have to scrub a dried mystery blob later) will thank you.
- Use Mats and Rugs (Wisely): Place doormats at entrances to catch dirt before it hits the floor. A lot of the grime that ends up on linoleum comes from shoes. Encourage a “wipe your feet” rule, or even better, a “no shoes inside” policy if that suits your household. Use runners or area rugs in high-traffic zones (like the path from the fridge to the stove – you know that highway). Just remember our earlier advice: use rugs with natural or non-staining backings to avoid that rubber rug rebellion. Mats in front of the sink are great to catch water drips, just make sure they dry out and are cleaned periodically too.
- Furniture Pads Are Your Friends: Attach felt pads under table and chair legs, or any furniture that gets moved around on the linoleum. This prevents those annoying scuff trails and gouges. It’s a cheap fix to avoid mysterious scratch hieroglyphics appearing on your kitchen floor when the kids play “slide the chair.” Also, if you need to move something heavy, put down a sheet of plywood or use furniture sliders – dragging a fridge across linoleum is a horror story you don’t want to star in.
- Gentle Cleaning Routine: Aim for a weekly mop session as part of your cleaning routine. You’ve seen our step-by-step – it doesn’t have to be a marathon. A quick mop with a mild solution once a week (or twice in high-traffic homes) keeps things from ever getting truly grimy. If you maintain this schedule, you’ll rarely need to bust out the heavy scrubbing tactics. And your linoleum will consistently look like the rockstar flooring it is, without big dramatic cleaning interventions.
- Polish Occasionally (If Needed): If your linoleum starts to look dull or a bit sad, consider applying a linoleum floor polish every so often (say, every 3-6 months or as the product recommends). This will restore shine and add a protective layer. Just be sure the floor is super clean before you do, or you might lock in dirt under the polish – oops. Follow the polish product directions carefully, and don’t overdo it. A little gloss can make your floor look new again and make it easier to clean (since dirt will sit on the polish, not the linoleum itself).
- Sunlight and Ventilation: This might sound odd, but linoleum is a bit like a houseplant – it likes some light and air. Linoleum contains natural materials (like linseed oil and wood flour) and can slightly yellow if covered up and never exposed to sunlight (this is called “ambering”). If you have rugs, try lifting or moving them occasionally to let the floor get some light and “breathe”. Also, avoid covering the floor with plastic mats or anything that can trap moisture against it. Good airflow prevents any mustiness, especially in corners or under appliances.
- Know Your Floor: Lastly, it helps to know whether your floor is true linoleum or vinyl, and if it has any special finish. Many modern “linoleum” floors might actually be vinyl. True linoleum is usually sealed with a protective topcoat. If your floor is older and the seal is worn, you might consider re-sealing or waxing it (with products made for linoleum) to protect it. If it’s vinyl, stick to vinyl-safe practices. When in doubt, err on the side of gentle cleaning and consult flooring experts or the manufacturer for specifics.