Quick Tips
If you’ve ever had the pleasure of smelling something suspiciously close to burnt toast while running your dryer, trust me—it wasn’t the ghost of your missed breakfast. It was probably the lint in your dryer vent overheating. I learned this the hard way when, years ago, I nearly incinerated my favorite pair of sweatpants. I’d been ignoring the ever-growing mass of lint collecting inside that vent for months. Turns out, failing to learn how to clean a dryer vent can transform your laundry day into a major house fire hazard.
But fear not, pyrotechnically challenged friend. This guide is here to walk you through everything you need to know about cleaning that dryer vent safely and effectively. From the must-have tools to the step-by-step approach, we’ll banish dust bunnies, lint clumps, and the sneaky hazards that can spark a flame faster than you can say “Where’s the fire extinguisher?” Let’s start by talking about why cleaning that vent matters in the first place.
Why a Clean Dryer Vent Matters
A dryer vent clogged with lint is basically a ticking time bomb. According to the National Fire Protection Association, dryers are responsible for thousands of house fires each year, with lint buildup being one of the primary culprits. When airflow is restricted, your dryer works overtime, creating more heat, and that intense heat plus cotton-lint tinder is a recipe for disaster.
On top of the obvious safety concerns, clogged vents also reduce your dryer’s efficiency. Your clothes take longer to dry, which costs you more in energy bills and shortens the appliance’s lifespan. The US Fire Administration’s guidelines on dryer safety emphasize regular vent cleaning as a key way to reduce fire hazards and increase dryer performance. So, if saving money, prolonging your dryer’s life, and avoiding a fiery fiasco sound good to you, regular cleaning is non-negotiable.
How to Clean a Dryer Vent the Right Way
Below, we’ll dive into the precise steps for how to clean a dryer vent. Feel free to adapt them if your machine has unique quirks or if you live in an apartment with limited space. But generally, the process is the same for most standard dryers—electric or gas. Let’s gather some supplies and gear up for dust bunnies galore!
What You’ll Need
- Dryer Vent Cleaning Kit or Lint Brush: A specialized brush with flexible rods can help reach deep into the vent.
- Vacuum Cleaner (with a hose attachment): Essential for sucking up loosened debris.
- Screwdriver or Nut Driver: For removing the dryer vent cover or clamps, if necessary.
- Microfiber Cloths or Rags: Handy for wiping away surface dust and lint.
- Mask and Gloves (optional but recommended): Lint can be irritating to breathe in, and gloves keep your hands clean.
- Flashlight: For peering into those dark vent recesses.
1. Unplug and Pull Out the Dryer
Before you do anything, turn off and unplug your dryer. If it’s a gas model, switch off the gas supply valve to be extra safe. Trust me, you don’t want electricity or gas lines mixing with your lint-removal mission—unless you’re filming a new reality show called “When Darwinism Attacks.”
Carefully slide the dryer away from the wall. Depending on your setup, you might need to tilt or maneuver it a bit, so proceed gently. The last thing you want is to break the dryer or your back.
2. Disconnect the Vent Duct
Locate the flex duct that connects your dryer to the wall’s exhaust port. This can be made of flexible foil, a semi-rigid metal tube, or something similar. Loosen the clamp (usually a simple ring clamp you can unscrew) and gently slide the duct off the dryer. Do the same at the wall end if needed.
Set the duct aside, and marvel at the fluff tumbleweeds you’ll likely find around the connection. If your dryer is like mine was, you’ll be muttering, “How did I not burn the house down with all this lint?”
3. Vacuum the Vent and the Duct
Grab your vacuum cleaner with its hose attachment. Start by vacuuming around the dryer’s exhaust port and the floor area beneath and behind the dryer. Next, point the hose into the wall port (the hole where the duct was connected) and suck out as much lint as you can.
Don’t be shy—stick the hose in as far as possible. For an even deeper clean, use a specialized dryer vent brush kit that typically comes with flexible rods. You can attach the rods to a power drill, giving the brush a spin that dislodges stubborn lint. If you go this route, feed the brush and rod in gently, rotating clockwise to avoid unscrewing the brush mid-vent (trust me, that’s no fun to fish out).
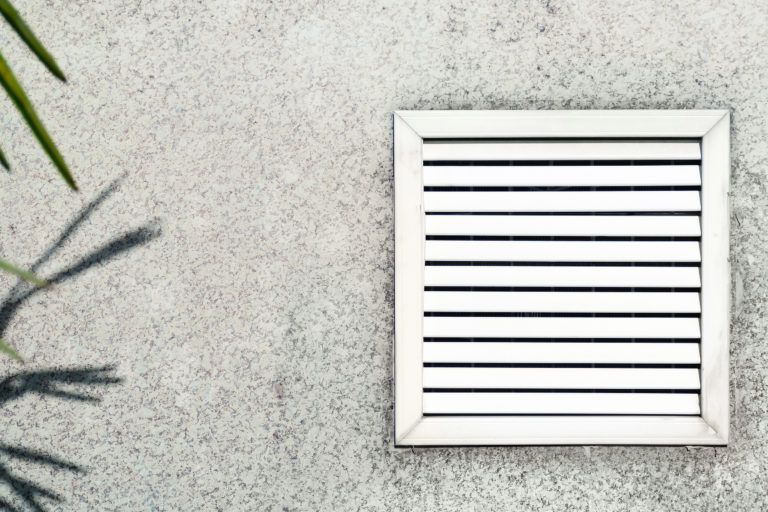
4. Clean the Exterior Vent
Go outside to where your dryer vent terminates—usually at ground level on an exterior wall. Sometimes, there’s a hinged flap or louvered cover meant to keep out pests. Pop or unscrew that cover open if you can, then vacuum or brush out any visible lint.
This step is crucial because if debris and critter nests block the outside exit, your vent cleaning efforts indoors won’t mean much. Make sure the flap can move freely when you’re done; it’s vital for proper airflow.
5. Clear the Duct Itself
Now turn your attention to the flexible duct you removed earlier. Shake out or tap it gently to dislodge any loose lint. Then use either your vacuum or a lint brush to clear it thoroughly. If the duct is really dirty or damaged (excessively crumpled or showing holes), consider replacing it altogether. A new, more rigid metal duct might be a wise upgrade; flexible plastic or foil can trap lint more easily.
Once you’re satisfied it’s lint-free (or you have a brand-new duct), get ready to reconnect everything.
6. Reattach and Position
Carefully reconnect the duct to both the dryer and the wall. Tighten the clamps so it’s snug but not crushing the duct. Push the dryer back toward the wall, being mindful not to pinch or kink the duct. If the duct is squashed against the wall, you’re undoing all that hard work by restricting airflow again.
Double-check the alignment: the path from the dryer’s outlet to the wall vent should be as straight as possible. Gentle curves are fine, but any sharp bends become lint-trapping hotspots.
7. Plug In and Test
Now for the moment of truth. Plug your dryer back in (or turn on the gas supply if you have a gas dryer). Run the dryer on an “Air Fluff” or low-heat cycle for about 10-15 minutes, ensuring air is flowing freely. Head outside and confirm the vent flap is opening and that you can feel a steady stream of air.
If everything checks out—no weird rattles or blockages—it’s a sign you’ve successfully learned how to clean a dryer vent. Congratulations on reducing the chance of an unplanned fireworks display in your laundry room!
8. Keep It Lint-Free Year-Round
Congrats, you’re done with the big cleanup! But remember, this is not a “once in a lifetime” chore. The National Fire Protection Association recommends cleaning your dryer vent at least once a year. If you do laundry every day (hello, big families), you might need to do it more often.
Set a reminder on your phone or calendar so you don’t neglect it again. A quick inspection every few months—checking for lint buildup and ensuring good airflow—can save you a mountain of trouble.
Common Dryer Vent Mistakes (and How to Avoid Them)
- Using Plastic or Vinyl Ducts: These are flimsier and can melt or catch fire. Upgrade to a semi-rigid or rigid metal duct if possible.
- Shoving the Dryer Too Close to the Wall: Kinking or crushing the vent duct restricts airflow. Leave enough space so the duct can be mostly straight.
- Forgetting to Clean the Lint Trap: While it’s not the same as the full vent system, a clogged lint screen can also create heat buildup. Clean it before or after every load.
- Ignoring the Exterior Vent: Critters, leaves, and general debris can quickly clog it. Make sure it’s clear and the flap can move freely.
- Waiting Until It’s a Problem: If your clothes start taking longer to dry, don’t shrug it off. That’s usually a sign of lint or obstruction. Take action ASAP.
Extra Tips and Tricks
- Go Gas? Double Check for Leaks: If you have a gas dryer, keep a nose out for any sulfuric “rotten egg” odor after you reattach lines. Shut everything off and call a professional if you suspect a leak.
- Watch for Condensation: If your laundry room gets steamy or you see condensation on the walls, it could mean air isn’t venting properly. Inspect your duct setup.
- Consider Professional Help: If your vent is super long, goes through multiple floors, or you’re just not comfortable tackling this yourself, call a pro. Better to spend a little extra than risk doing it wrong.
- Boost Your Dryer’s Performance: A clean vent allows for faster drying times, which means less wear on your clothes and the machine. It’s a win-win.
- Clean the Vent Hood Too: That protective cover on the outside can get grimy or stuck. Give it some TLC so it keeps critters out without hindering airflow.
Keep the Flames at Bay
Maintaining a clean dryer vent is one of those tasks that’s both life-saving and money-saving. When you spend just a bit of elbow grease removing lint, you’re drastically reducing your fire risk, improving drying efficiency, and adding years to your dryer’s lifespan.
Remember, part of knowing how to clean a dryer vent is also being aware of when to do it. Mark it on your calendar, keep an eye on your machine’s performance, and never overlook any odd smells or lagging dry times. The sense of relief you’ll feel after vacuuming out that fluff is second only to knowing you’ve dodged a potential meltdown in your laundry room.
Besides, if you’re going to start a fire, let it be your passion for organization or your fiery love of fresh, lint-free clothing—not your neglected dryer. Here’s to safer, more efficient laundry days that won’t have you dialing 911.