Quick Tips
Your dryer faithfully churns out warm, fluffy laundry, but when was the last time you gave it a proper cleaning? If your answer is “Uh… never?” you’re not alone. A neglected dryer can become a breeding ground for lint buildup, funky odors, and even a potential fire risk. But don’t worry—it’s not hard to keep your machine in top shape.
Why Cleaning Your Dryer Matters
A clogged or dirty dryer isn’t just inefficient—it’s dangerous. Lint buildup in the vent system is one of the leading causes of house fires, according to the U.S. Fire Administration. Beyond safety, a clean dryer works faster, uses less energy, and extends the lifespan of your machine. A little maintenance goes a long way toward keeping your dryer running smoothly and your clothes drying properly.
What You’ll Need to Clean Your Dryer
Before getting started, gather the following supplies:
- Vacuum with hose attachment – For removing deep lint buildup.
- Microfiber cloth – To wipe down the interior and exterior.
- Warm, soapy water – For general cleaning.
- White vinegar or baking soda – Helps eliminate odors.
- Soft-bristled brush – For scrubbing stubborn lint.
- Screwdriver (if needed) – To remove vent covers for deep cleaning.
How to Clean a Dryer in 6 Steps
1. Empty the Lint Trap and Wash the Screen
Your dryer’s lint trap catches an alarming amount of dust and fibers with every load. Remove the lint screen and clear out any visible lint. Then, wash the screen with warm, soapy water to remove residue from fabric softeners and dryer sheets, which can reduce airflow. Let it dry completely before reinserting.
2. Vacuum Inside the Lint Trap Housing
Even if you clean the lint trap regularly, some lint inevitably sneaks past and accumulates inside the housing. Using a vacuum hose attachment, reach inside the lint trap opening to suck out trapped debris. If necessary, use a soft-bristled brush to loosen stubborn lint before vacuuming. This step prevents overheating and improves airflow.
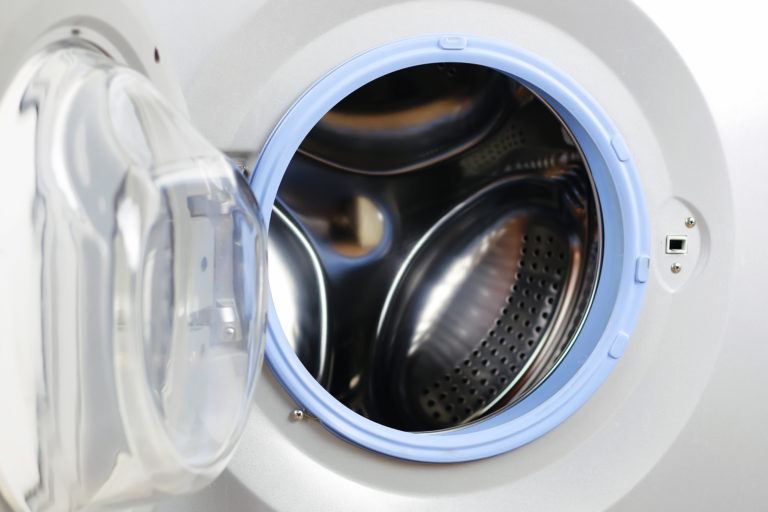
3. Wipe Down the Drum and Interior
Over time, dryer sheets and fabric softeners leave behind a waxy residue that can transfer to clothes. Dip a microfiber cloth in warm, soapy water and wipe down the inside of the dryer drum. For stubborn grime, use a 50/50 mix of vinegar and water. If there’s an odor, sprinkle baking soda inside the drum, let it sit for 15 minutes, then wipe clean. Leave the door open for air drying.
4. Clean the Exhaust Vent and Ductwork
The dryer vent is where the real trouble starts. Unplug the dryer, then disconnect the exhaust vent from the back. Use a vacuum hose or a dryer vent cleaning brush to clear lint buildup inside the duct. If possible, go outside and remove any lint from the external vent cover as well. A clogged vent reduces efficiency and increases fire risk, so aim to clean it at least every six months.
5. Wipe Down the Exterior and Control Panel
Don’t forget the outside of your dryer! Dust, detergent spills, and lint can coat the control panel and sides over time. Use a damp microfiber cloth with mild soap to wipe down the exterior. Avoid using harsh chemicals that could damage the finish. Pay extra attention to the buttons and knobs, where dirt and grime like to collect.
6. Reassemble and Run a Test Load
Now that your dryer is clean, reconnect the vent hose, plug it back in, and run a test cycle with a few damp towels. This helps clear out any remaining lint and ensures everything is working properly. If you notice that your dryer is still running inefficiently, check for any lingering blockages in the vent system.
How Professionals Deep-Clean Dryers
Sometimes, a simple DIY cleaning isn’t enough. Here’s how professionals tackle deep dryer maintenance:
- High-powered vacuums and rotary brushes – Remove compacted lint from hard-to-reach areas.
- Thermal inspections – Identify overheating issues before they become a fire hazard.
- Duct replacement – If the vent system is excessively clogged or damaged, pros may install new ductwork.
- Internal component checks – Technicians inspect heating elements, belts, and sensors for wear.
If your dryer still isn’t performing well after cleaning, a professional service may be necessary (NFPA Dryer Safety Guide).
How Often Should You Clean Your Dryer?
- Lint trap: After every load to maintain airflow.
- Drum and interior: Once a month to prevent residue buildup.
- Exhaust vent and ductwork: Every 6 months, or more often if drying time increases.
- Professional inspection: Once a year for optimal safety and efficiency.
Final Thoughts
A clean dryer isn’t just about fresh laundry—it’s about saving energy, preventing fires, and keeping your machine running smoothly. With just a little maintenance, you’ll extend the life of your dryer and make sure it operates efficiently for years to come.
For more appliance maintenance tips, check out How to Clean a Washing Machine. Keep your laundry routine running smoothly!