Quick Tips
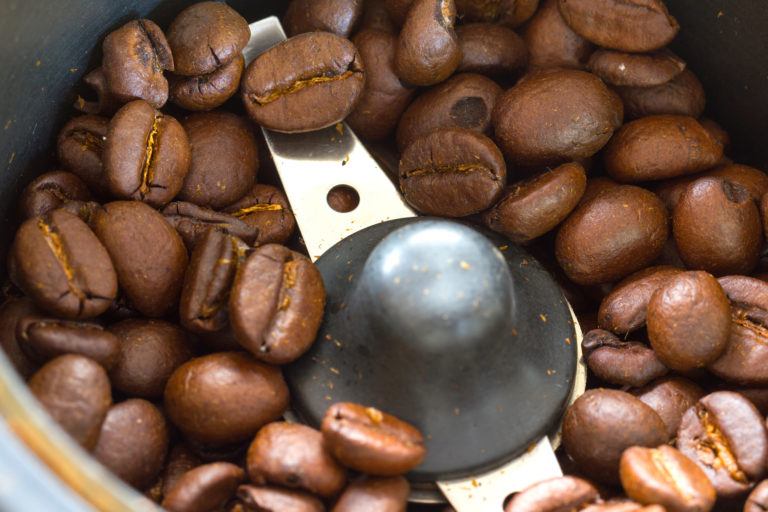
Have you ever trudged into the kitchen for that lifesaving cup of coffee only to find it tasted…off? I remember one morning vividly: I had just bought a new bag of single-origin beans, excited to brew my first cup, and after the first sip, there was a strange, minty aftertaste. My mind traced it back to the holiday blend I’d used the week before—one that tasted of peppermint and chocolate. I realized the culprit wasn’t my fancy coffee machine, but my grinder. That old residue had clung to the burrs, hijacking the flavor of my fresh beans. That’s when I decided I had to learn how to clean a coffee grinder properly.
In this guide, I’ll share a straightforward method to keep your grinder in top shape, plus extra tips for deep cleaning and maintenance. By the end, you’ll know exactly how to handle the stale oils and gunky grounds that sabotage your brew. Because, let’s be honest: that first cup should taste like the beans you actually chose, not whatever lingered from last month’s blend.
Why a Clean Coffee Grinder Is Important
Regular cleaning of your coffee grinder is more than just a nice habit; it actually enhances your coffee’s flavor and extends the life of your machine. When coffee beans are ground, they release oils that can turn rancid over time, clinging to the burrs and other inner surfaces. According to the National Coffee Association’s cleaning guidelines, those stale oils and leftover grounds can contaminate every new batch, creating bitter off-flavors no amount of fancy brewing can mask.
Moreover, a grinder caked in residue works harder, which can cause the motor to strain and potentially shorten its lifespan. Regular cleaning helps keep your coffee’s aroma and taste at their peak, so you don’t waste great beans on a dirty grinder.
How to Clean a Coffee Grinder Naturally
Many coffee enthusiasts recommend using natural ingredients—like plain white rice—to keep your grinder fresh without introducing harsh chemicals. Why? Because coffee beans are aromatic and easily affected by any residue or artificial odors. When you clean naturally, you’re ensuring your next batch of beans will be free of chemical whiffs or soapy aftertaste.
Uncooked rice is a popular tool for this because it’s abrasive enough to dislodge stuck coffee particles, yet gentle enough not to damage the burrs. There are also commercial cleaning tablets designed specifically for grinders, such as those featured on Serious Eats. Either option works well, but if you prefer a DIY route, rice is the budget-friendly champion.
What You’ll Need
- Uncooked White Rice (or Grinder Cleaning Tablets): About 1/4 cup for each cleaning session
- Soft or Pastry Brush: Ideal for sweeping out leftover grounds and residue
- Lint-Free Cloth or Paper Towels: For wiping away oils and any film inside the grinder
- Mild Dish Soap: (Only if your manufacturer recommends it for removable parts)
- Compressed Air or Vacuum Cleaner (Optional): Useful for getting rid of stubborn debris
- Warm, Soapy Water: (For parts that are safe to wash—check your grinder’s manual)
1. Unplug and Disassemble
Safety first. Make sure the grinder is switched off and unplugged before you do anything else. Some models have safety locks that keep them from operating if the lid or hopper is removed, but don’t rely on that alone. Once unplugged, carefully remove any detachable parts, such as the hopper, the grind chamber, or removable burrs. Dump out any remaining beans or old grounds into the trash or compost (coffee grounds do wonders in a compost bin).
Use your pastry brush or a clean, lint-free cloth to wipe out as many loose particles as you can. This initial sweep makes the deeper cleaning step go much smoother.
2. Pre-Wipe and Inspect
Next, give the removable parts a closer look. Are the plastic surfaces cloudy? Do they feel tacky with coffee oils? If so, wipe these parts with a warm, damp cloth. If the manual allows, you can wash them with mild dish soap and warm water.
Pay special attention to the burrs if your model has a removable burr system. Over time, coffee residue can form a varnish-like layer that’s tough to remove. Use a soft brush to break up these hardened oils, but proceed gently to avoid damaging any critical components.
3. Add Rice or Cleaning Tablets
Reassemble your grinder just enough so you can run it safely—usually, this means reinserting the burrs or grind chamber, then placing the hopper on top. Pour about 1/4 cup of uncooked white rice into the hopper. If you’re using commercial cleaning tablets, follow the product’s recommended amount.
Plug the grinder in and set it to a medium grind. Let it run until the rice (or tablets) have been completely ground. You’ll notice the shredded rice turning light brown or beige—this means it’s absorbing and scraping away old coffee oils.
4. Discard and Brush
When the rice is finished grinding, power off the machine and discard the ground rice. At this point, you’ll likely see evidence of the oils that had clung to the burrs. Use your soft brush to go over the inner chamber, focusing on corners and crevices. If you spot any stubborn bits, a quick shot of compressed air can loosen them, or you can use a narrow vacuum attachment.
Brush off the burrs themselves if you can reach them. Inverting the grinder (carefully) and sweeping with the brush often works best. It’s satisfying to see the last bits of coffee dust drifting away into oblivion, freeing your grinder of stale residue.
5. Wipe Down the Interiors
To ensure you’ve removed as much oil as possible, wipe the inside of the grinder and the hopper with a slightly damp, lint-free cloth. If you encounter lingering sticky spots, a tiny drop of mild dish soap on your cloth can help, but use it sparingly—no one wants soapy-tasting grounds.
Afterward, follow up with a dry cloth or paper towel to remove any remaining moisture. Make sure everything is thoroughly dry before reassembling. Dampness can lead to clumping grounds or even mold, neither of which belongs anywhere near your prized coffee beans.
6. Deep Clean Removable Parts (If Needed)
If you have a burr grinder with a removable burr assembly, you can sometimes achieve a deeper clean by soaking the burrs in warm, soapy water—provided your manual says this is okay. Some burrs have special coatings or materials that shouldn’t be submerged. If it’s allowed, soak them for a few minutes, then gently scrub away any residue with a soft sponge or brush. Rinse thoroughly, pat them dry, and let them air-dry completely before reassembly.
For hoppers and lids that detach, a quick wash in warm, soapy water typically eliminates cloudy film. Rinse them well so no soap remains, then dry them off. Letting them air-dry fully helps prevent moisture from building up in the grinder and sabotaging your coffee’s flavor.
7. Reassemble and Test
After everything is clean and dry, carefully put the grinder back together. Double-check all parts—especially the burrs—are seated correctly. Run a small handful of coffee beans as a test. Listen for any strange noises; if you hear something off, power down and check the burr alignment. If the grinder runs smoothly and the grounds look normal, you’ve successfully learned how to clean a coffee grinder.
Inhale the fresh scent from your newly cleaned machine—it should smell neutral or faintly of coffee, not stale oils. It’s a small effort that pays huge dividends in flavor.
Bonus Tips and Maintenance Advice
- Brush After Each Use: A quick sweep with a soft brush after every grind session helps prevent grounds from piling up.
- Empty the Hopper: If you won’t use the grinder for a few days, clear out the beans to avoid stale residue.
- Establish a Routine: According to The Spruce’s coffee maintenance guide, monthly or biweekly deep cleans help maintain optimal flavor and performance.
- Tackle Odors Carefully: If you want to try vinegar or baking soda for extra odor-busting, use them sparingly and wipe thoroughly.
- Know Your Machine: Check your grinder’s manual for any specifics on cleaning—especially if you’re not sure about washing or soaking certain parts.
Cleanliness is key to a flavorful, aromatic cup of coffee. Learning how to clean a coffee grinder involves a handful of simple steps—unplugging, disassembling, running rice (or tablets) through, brushing away debris, wiping down the chamber, and reassembling for a test run. This routine drastically improves every sip you take. Consider it a small, worthwhile investment: a few minutes of cleaning for the best possible morning brew.